Springwatch has arrived in our garden

Hedgehog

We’ve recently treated ourselves to a new toy… an infrared camera trap. Tonight was a trial run with it, and we are utterly delighted with the results… our first ever night time image at 1:57am this morning was Mr Hedgehog having a wander around our orchard. I cannot wait to see if he comes back tonight and whether he brings anyone with him. We have twisted the camera a little further round to the left to try and get a better shot of him as he emerges from the wild. Watch this space…

To soften or not to soften? That is the question

The Light of the Land

So the age old photography mantra is to capture sharp images. But since I have started taking infrared shots I have found myself experimenting with post processing like never before.

Some new effects which are gradually introducing themselves to my processing regime include boosting contrast to crazy levels, softness, graining and vignetting. (!) I know, I know… I said I would never post process to this extent, but I do love the way that infrared light challenges preconceptions about sharpness and detail. All of a sudden the detail almost does not matter – the light is the star of the picture, not the subject. And as long as I disclose how I post process, then surely there is no harm in a little creative experimentation?

That’s how I see my infrared photography… it’s more of an art form, a creative experiment, a play on expectations and the norm, it’s painting with monochrome – for grown ups :)Take for example the image to the left.  This is a very soft image, purposefully created in this way to accentuate the light and concentrate the focus on the bands of lights that help to illuminate the single tree. I have purposefully framed the shot so that the light and the tree top are the main focus, complemented by the foliage at the foot of the shot and the dark endless African sky above.

Compare this to a sharper version of the shot (right). I like both, but I feel that the detail in the image to the right somehow detracts from the beauty and rawness of the image. Sometimes all you need is light?

But I’d love to know which you prefer!

Other infrared shots from Taraji Blue are available in our online infrared gallery.

A lone African tree captured in monochrome

Being prepared as a photographer in a digital world

IMG_20130608_193915

This is a technical post about what to do when (before!) equipment fails and how to work around difficulties in non-urban locations. Earlier this year we travelled to Kruger National Park with a small group and spent a fantastic two weeks exploring the southern part of the park. We’d been before and have plenty of experience in Africa and isolated locations. The first few days went well technically and thankfully this was the period we saw most wildlife. As the trip went on though, our equipment started to misbehave. In this post I’ll take each occurrence, detail what happened and what I’d do differently in the future.

Hard drive glitching or failure – having an alternate approach

We usually back up our CF cards to a pair of Freecom Tough Drives before clearing them ready for the next day’s shoot, and use a laptop to do the copy. On this trip, something odd started happening: extreme lockups for 30 seconds or so whether nothing was possible, then a return for 10 or 20 seconds, and back into a lockup. The computer was basically unusable (not helpful for Marie trying to prepare some work materials on holiday) and this was the first time it’d exhibited this behaviour. I suspected an SSD failure but out there not much can be done to work around it – the laptop went back in the boot of the car and stayed there.

Three things to learn:

a) don’t change anything before you go on a trip. We hadn’t, actually – the SSD has been in use for some time, but clearly something updated or the disk hit some issues which meant it performed terribly. Once I got back, I had some success through updating the Intel RST drivers, but even then there are issues with Windows 8 which mean I’ve switched back to a spinning disk for greater reliability in the field.

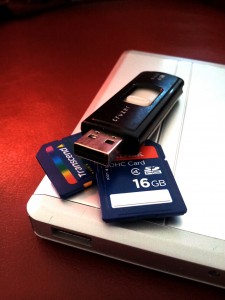
b) take plenty of storage for your cameras. We were a little pushed by the end up the trip, to the extent of having to use our near-abandoned 1Gb CFs cards on the final days, which with 25mb files coming out of the 7Ds is like using your final roll of film. We just scraped through, and obviously could have started to sift through the early cards to erase clearly missed photos, but that just cuts into your day.

c) take a second operating system. Probably the main learning experience from this particular drive failure is that when you are only using the laptop to do data transfers (rather than Lightroom processing or editing) then it doesn’t matter much what you are using. In future I’ll take a USB stick with bootable Ubuntu installed so that if the laptop drive fails entirely – and this is always a possibility – there’s still the opportunity to use the machine as a bridge between camera and external disk. There are other ways to do this – a Nexus 7 or smartphone can feasibly be a backup with the correct cables and software.

DO change things before you go on a trip – fix any bugs

In contrast to the above advice not to tweak and play around with a stable system, one of the major frustrations for me was having a Canon EOS 7D which had performed flawlessly for the previous 3 years but suddenly started freezing once we’d reached Kruger. It would seize up entirely without warning and responded to nothing – even the power switch had no impact. The only way to get back into shooting mode was to remove both batteries from the grip and re-insert them, at which point it’d be available again. This was clearly frustrating on self-drive safari, where things happen quickly and you have seconds to stop the vehicle, pick up your camera, and find that nothing works.

After I returned home I discovered there had been a firmware update a couple of months previously which addressed this problem, and having applied it I haven’t had the same lockups since. However it’s one of those cases where it is worth spending the time to ensure that everything about your gear is clean and in order – and a rare occasion where ‘if it ain’t broke (yet) don’t fix it’ is not applicable: keep an eye on the release notes from your camera manufacturer and if something seems a serious issue, even if it isn’t hitting you yet, consider upgrading the firmware to avoid disappointment on location.

SD cards which are too slow for HD video – the importance of testing and knowing your gear

On a whim after seeing Charlie Hamilton-James’s fabulous shots of cheetah in infrared we fancied a try and had bought a little Olympus XZ-1 (“Little Yellow”) due to reports of the infrared blocking filter being pretty ineffective. Experiments in the far north of Finland with Little Yellow and an infrared pass filter were interesting (see below) – however the slow shutter speeds required, the resulting high noise from a smaller sensor camera, and the fact that you have to pre-focus before attaching the black filter made it clear that this wouldn’t really work in somewhere as fast paced as Africa. While preparing for the trip we decide at the last minute to splash out for a DSLR infrared conversion – as existing 18mp+ users we picked up a second-hand Canon EOS 550D (“Big Blue”) from Protech Photographic. Great service from both companies – the camera had been on both round trips in less than 10 days and was ready to roll.

However, this meant little time for testing, and even though we’re used to using Sandisk Extreme CF cards in our DSLRs, the 550D’s SD card slot tripped me and for some reason I went for normal Sandisk SDs. It wasn’t until later in the trip that we realised that while the RAW capture rate was fine, any attempt to capture HD video (yeah, in infrared) was thwarted as the cards just couldn’t keep up for more than a second or two.

Action: know your equipment, think about your needs, don’t scrimp

Test shot of Finland trees in infrared, showing black sky and light white branches and leaves

Lessons in infrared photography – just when you think you have cracked it…

Regular followers of the Taraji Blue blog will know that I have recently become obsessed with infrared photography. For Christmas, Ali bought me a compact digital camera complete with infrared filter and I was immediately hooked. After first experimenting with the style of photography in Lapland over Christmas, I took to the streets of York every available weekend to hone my skills further. The wee compact was fun to use and gave some really great results – the only issue was that because the screw on infrared filter was so black you could not focus using it. You therefore had to unscrew the filter, focus and compose the shot, then replace the filter to take the image. Very fiddly and time consuming. Not an issue for landscape photography – but much more so when attempting to photograph wildlife or humans. Regardless, my main aim was to build up my skills with the equipment before the real test – South Africa in March 2013.

However, Alistair delighted me with a lovely birthday present just days before we traveled – a second hand Canon 550D which had been chipped to take only infrared stills and infrared HD video.  Needless to say, it had not been out of my hands for the entire trip to South Africa. It is a fantastic wee camera and I really loved using it. I spent most of my time using a prime 50mm canon lens – a lens that I have never really used / appreciated before, however I found it really made me alter my perspective on Africa – I’d shift my focus from the Big 5 to the endless skies and textures of Africa. I’d take more notice of the light and the way it illuminates plants and trees. I’d spend time waiting for the right light tunnels though forests, or waiting for shadows to dance across the sands and waters of Kruger. It gave me an entirely new focus.

I’d love to be able to share some real tips with you on infrared photography – but to be honest, I am still learning and don’t want to show myself up. I thought I had got to grips with it quite quickly – but then after using it intensively in Africa I became more and more attuned to the subtle differences in light and texture that would result when you altered your focus from landscape to sky, or from light to dark subjects, but the results were not consistent and I have been unable to draw firm conclusions. The time of day also had a huge impact – I expected the raw midday sun to yield the most dramatic results, but instead I found myself drawn to the light at dusk and on overcast days when the sky would be covered in thousands of tiny clouds of cotton wool.

Twhree wee tips I can, however, offer is to:

a) buy a pair of very tinted sunglasses. I used some reasonably cheap ones with a sepia type tint which illuminated the light in the clouds, sky and landscape in a similar way to infrared – offering me a glimpse of what shots might work before I even lifted the camera to my eye.

b)  Turn the photo preview on your camera to monochrome (opposed to displaying the images in infrared) as this gives you a much better ‘feel’ for how the picture will turn out once post processed.

c) Use a small aperture. I used F18 a lot, as this enabled me to capture a huge amount of depth in the texture of the foreground as well as the endless cloud filled skies. It also allowed for many different variants of light to be captured in the image – illuminating plants, skies and the ground in unique ways.

Above is my favorite shot from Africa taken with my Canon 550 infrared camera. Further images are also available in the Taraji Blue infrared online photo gallery. I welcome any feedback on my images  – and any tips – because, as I say, I am still learning and have a long way to go!

A Different Perspective On African Wildlife Photography.

Iiiimpppaaallllaaa

I’m chuffed that we seem to have some very different shots from our time in Kruger National Park this time round – and not just because of my shiny new infrared camera. Alistair has taken some stunning paint-like images of impala (above), capturing their movement and grace in a new light, and I had a great time capturing the creativity of mother nature as she created patterns and shapes in water (below).

I must admit, I don’t find it easy to reinterpret the usual photographic suspects – I am all too tempted to grab the zoom lens to capture the big cats, beautiful birds and graceful elephants in all their glory – but I was also aware that this was our third time in Kruger and our third time to Africa in just 14 months so we already had plenty of ‘stock shots’ and there was no point in duplicating these. The challenge was, therefore, to capture Kruger in a different light and shed another perspective on the incredible African landscape and wildlife that inhabits it.

Two of my favorite images have been showcased in this blog. More photos are available in our Taraji Blue South Africa gallery – and we will also be sharing them regularly on our facebook page http://www.facebook.com/tarajiblue

Into Safety